
Tired of seeing the same old designs in Mehandi books and magazines? Want to try something new and different for your next Mehandi design? Then this post is for you! Here we will show you how to design your own Mehandi patterns that are unique. stylish and sure to impress everyone.

Select a Mehandi design that you like
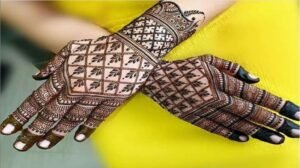
Selecting a Mehandi design can be a difficult decision. There are endless design combinations of Mehandi to choose from. It is important to pick out one that you really like Different Mehandi ka designs indicate different meanings. It is important to make sure whichever design you select resonates with you. Often Mehandi patterns are elaborate and elegant, but there are also simpler designs that feature more minimalistic styling. Whatever Mehandi ka design you choose should be the one that speaks to you and encapsulates your unique style.
Draw the design on your hand using a pencil
Ever wanted to have Mehandi design without all the mess? Drawing Mehandi patterns on your hand using a pencil is a great way to experience all the beauty of Mehandi without any stress or having to endure the waiting time for it to dry. Whether you want to practice Mehandi art, or just want something pretty on your hand, this method is an easy, quick, and clean option. All you need is a few pencils and some paper (or even your hand if you feel brave enough) and you’ll be up and running in no time!
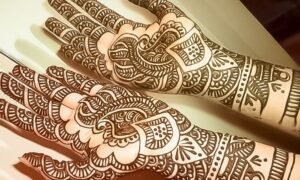
Fill in the design with henna paste
Creating Mehandi designs for backhands is an enjoyable and creative experience. The first step in the process is to image the desired design; this is followed by using an applicator to fill in the Mehandi paste with intricate detail. The paste, made of henna powder, lemon juices, tea leaves, sugar, and a few other ingredients, has dye-releasing properties that allow. It stains the skin on contact. Once the paste has been filled in and properly dried. It will take between twenty minutes and two hours before the design begins to show through. After that time has passed and the Mehandi design has done its work, it will only remain visible on the skin for as long as one month-making Mehandi an attractive way to adorn your hands (or any other body part) for a temporary tattoo effect!
Let the paste dry for several hours

Creating Mehandi designs on the front of the hand is a beautiful process, but it requires patience and precision. After carefully drawing the design with Mehandi paste, it is essential to let the mehndi dry for several hours to ensure that its coloring has been set into the skin. Allowing Mehandi plenty of time to dry will ensure that you are left with a beautiful and intricate Mehandi design that will last for days or even weeks.
Remove the dried henna paste to reveal your beautiful Mehandi design!

Nothing quite compares to the feeling of full hand mehandi designs carefully adorning your palms and hands. After spending hours crafting each detail and perfecting patterns. hey, give us fashionistas an excellent opportunity to decorate our skin – literally! To achieve maximum color vibrancy in the art, it’s important to remove the dry paste once the design has been set. Cautiously scrubbing this layer off will unveil a full-bloomed lotus that a beauty like you can be proud of!
Mehandi is a beautiful and temporary form of body art that originates in India. If you’re looking to try Mehandi for the first time, follow these simple steps to achieve a stunning design. First, select a pattern that you like. Next, use a pencil to draw the design onto your hand. Then, fill in the design with henna paste. Once the paste has dried (this can take several hours), remove it to reveal your fabulous new Mehandi!